
Managing a Dedicated Windows Media Server
Step 1 - Launch Remote Desktop and Connect
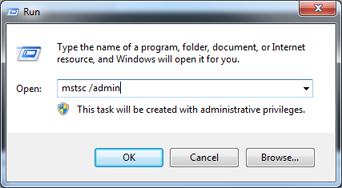
Go to Start menu, click Run… then enter ‘mstsc /admin’ into the box and press enter. If you don’t have a Run… option you type directly into the text field in the Start menu’s search box.
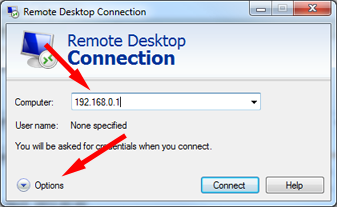
Enter the IP address of the server, then press the ‘Options’ button.
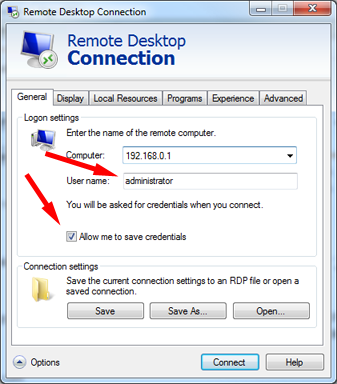
Type in the username (usually ‘administrator’) and check the ‘Allow me to save credentials’ box. Then press Connect.
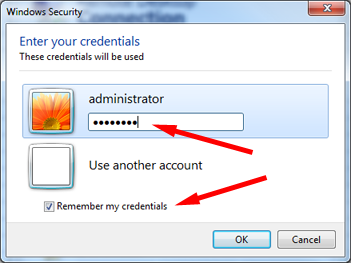
Check the ‘Remember my credentials’ box, then type the password and press ‘OK’
Step 2 - Open Computer Management console
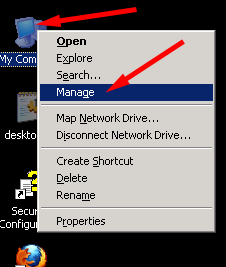
Right click ‘My Computer’ and choose ‘Manage’.
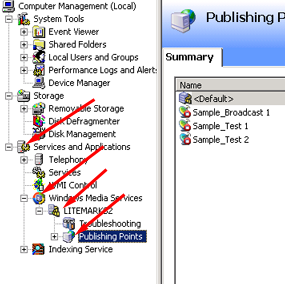
Drill down into the Windows Media Services snap-in.
Step 3 - Add the Publishing Point
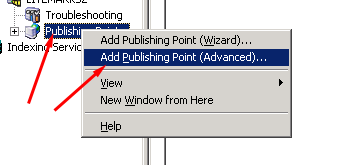
Right click ‘Publishing Points’ and choose the ‘Add Publishing Point (Advanced)...’ option.
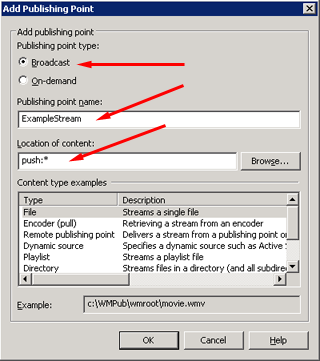
Select ‘Broadcast’ (should be the default). Enter a unique publishing point name, then type ‘push:*’ into the Location field and click ‘OK’.
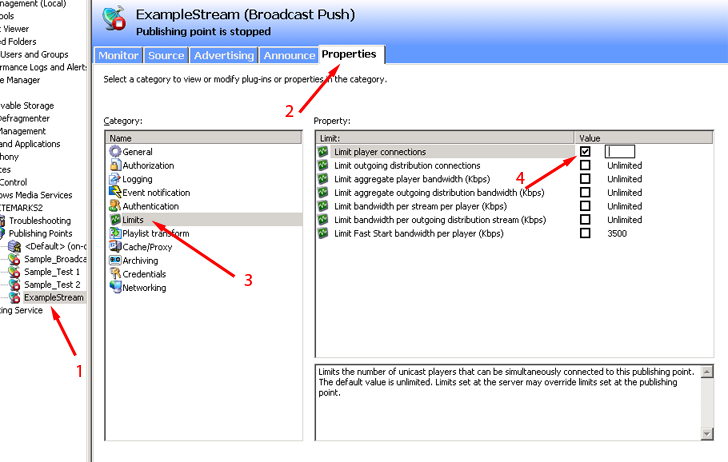
Step 4 (optional) - Define Limits
Click the new publishing point (ExampleStream in this case), click the ‘Properties’ tab, click ‘Limits’ and now you can define some limits such as maximum player connections. NOTE: It is not recommended to limit anything except for max connections because it will slow down player connection times.
At this point your publishing point is ready, and an encoder can now connect to the publishing point using ‘Push’ mode and the username ‘push’ and password ‘push’. You don’t have do do anything more than this. However, if you would like your encoder to use a unique username and password, you can add Windows users. The next few steps describe how to add a unique user and password.
Accessing the Stream
The stream location for use in player links and embed code, in this case, will be in the format http://1.2.3.4/ExampleStream (replace 1.2.3.4 with the actual IP of your server).
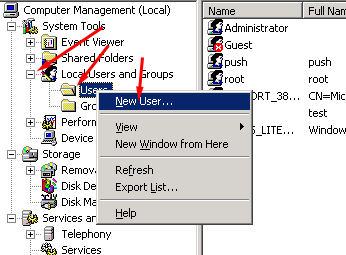
Step 5 (optional) - Add Encoding Users
In the main Computer Management screen, Drill down into Local Users and Groups snap-in, right click ‘Users’ and choose ‘New User…’
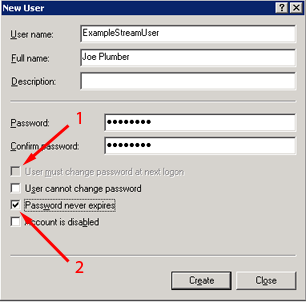
Enter the User name and password, and optionally a full name and description to help identify the user. Uncheck ‘User must change password at next login’ and check ‘Password never expires’. Now click ‘Create’.
Right click the new user you created, and choose ‘Properties’.

Click the ‘Member Of’ tab and click ‘Add…’. Enter ‘wms’ and click ‘OK’.
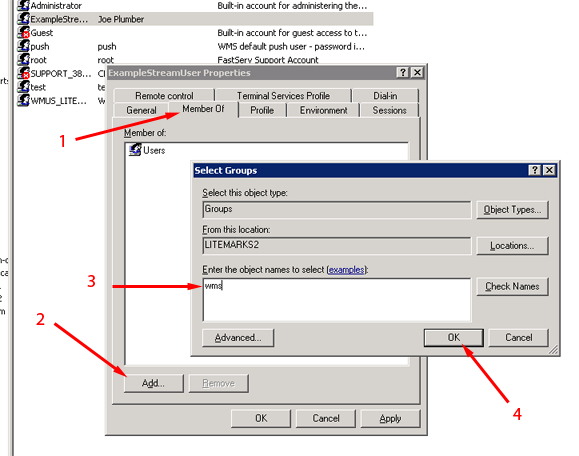
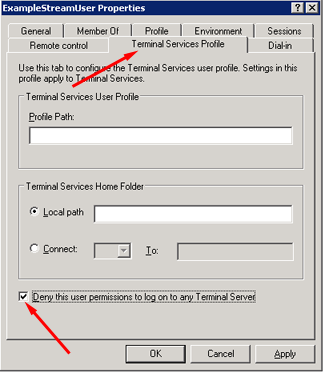
Click the ‘Terminal Services Profile’ tab and check the ‘Deny this user…’ checkbox. This is to prevent the user from being able to remote desktop into the server and limits him only to WMS streaming.
That’s it, now your client can now encode to the new publishing point using the new username and password you just created.
Share the Love
Back to Server Management
