
Adding or Updating an SSL Certificate in Cpanel
This article makes a few assumptions:
- ALL steps described are carried out in the website’s CPANEL interface only (ex: http://www.domain.com/cpanel). NOTHING AT ALL is done in WHM as a reseller or root. Managing certificates in WHM will almost certainly break things.
- You’ve already assigned the site a dedicated IP (or Fast Serv has already done so for you). SSL certificates require a dedicated IP for the site.
- You are NOT copying an SSL certificate from another host (in these steps you are renewing or installing a new certificate). If you need to copy an existing certificate from another server, please contact Fast Serv support for assistance.
Preparing the site for a new certificate
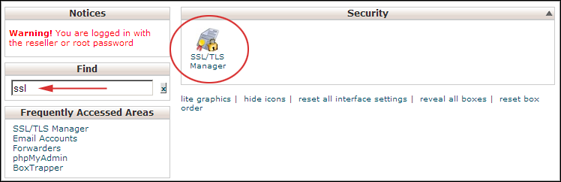
- Enter ‘ssl’ into the ‘Find’ field
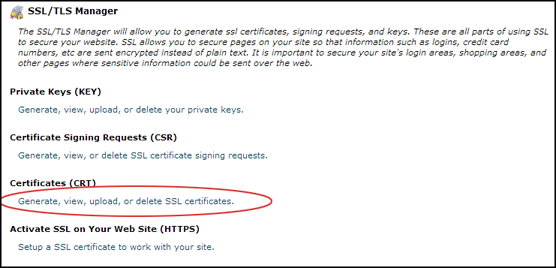
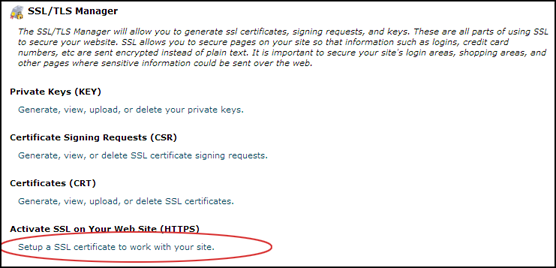
- Click ‘SSL/TLS Manager’ to the right
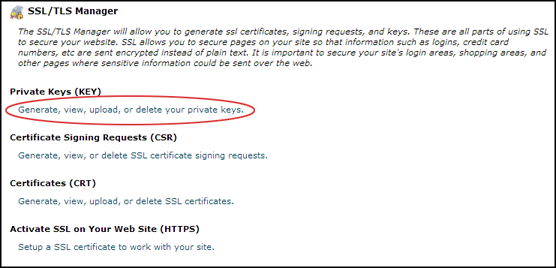
- Click ‘Generate, view, upload, or delete your private keys’
- Towards the bottom, enter the domain name (with www) in the ‘Host’ field. Use your real domain, not the one shown in the example.
- Click ‘Generate’

- You will now see a new Private Key. Cut and paste this in a safe place - you will need it when you apply for your certificate.
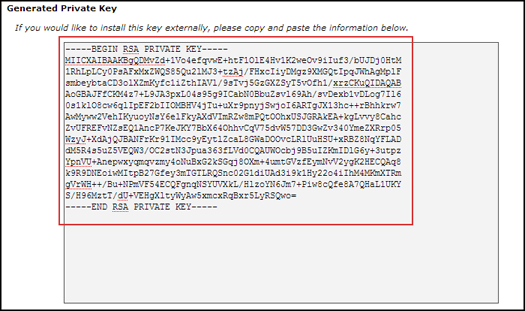
- Click ‘Return to SSL Manager’

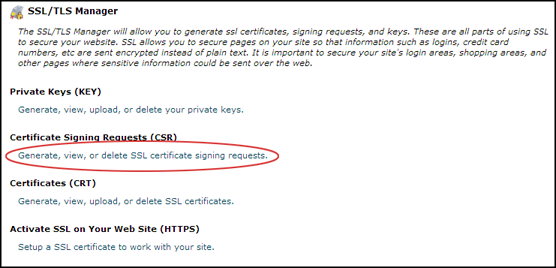
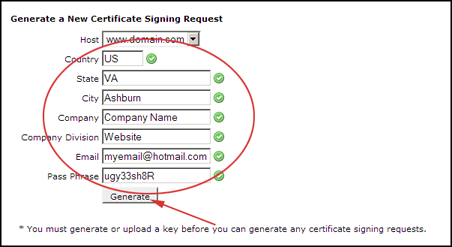
- Click ‘Generate, view, or delete SSL certificate signing requests.’
- Fill in Country, State, City, Company name, division (‘Website’ is fine), email address, and a random password.
- Do not use special characters in any field. Numbers, letters, and spaces are all that are allowed. Even the password!
- You do not need to write the password down—it’s used only for creating a random seed.
- Click ‘Generate’
- You will now see a new Certificate Signing Request. Cut and paste this in a safe place - you will need it when you apply for your certificate.
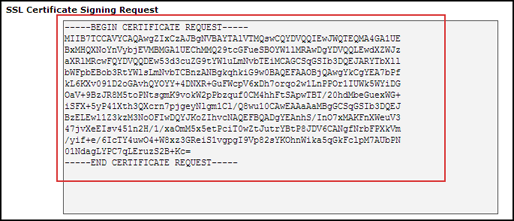
- Click ‘Return to SSL Manager’

Obtain your certificate
Use the Private Key and Certificate Signing Request obtained in the previous steps to obtain a new certificate (CERT) at your preferred vendor. We recommend GeoCerts.com if you don’t already have one chosen. Once you have your new certificate saved and copied, continue.
Install and activate the new certificate
- Click ‘Generate, view, upload, or delete SSL certificates.’
- Paste in your new certificate (or the .crt file if you have one - but not both!)
- Click ‘Upload’

- Click ‘Return to SSL Manager’
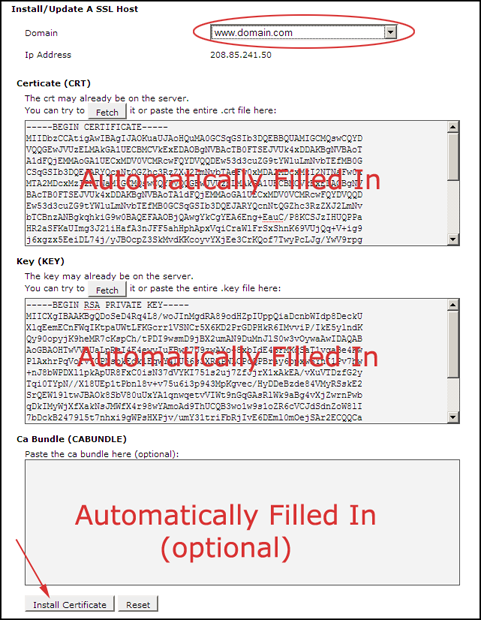
- Click ‘Setup a SSL certificate to work with your site.’
- Near the top, select the domain (with www.) from the drop down. The fields below should fill in automatically with the certificate and keys you uploaded and generated in previous steps.
- Click ‘Install Certificate’
You’re done!

Share the Love
Back to Cpanel
